End Gateway Pearl Launcher
Introduction
What This Build Actually Does
An End gateway pearl launcher is a protected throwing station for using End gateways, not a machine that creates portals or chooses destinations. You stand on a marked tile, aim an Ender Pearl into the gateway’s central portal block, and teleport to its linked destination. Platforms, barriers, and route signs make repeated trips safer.
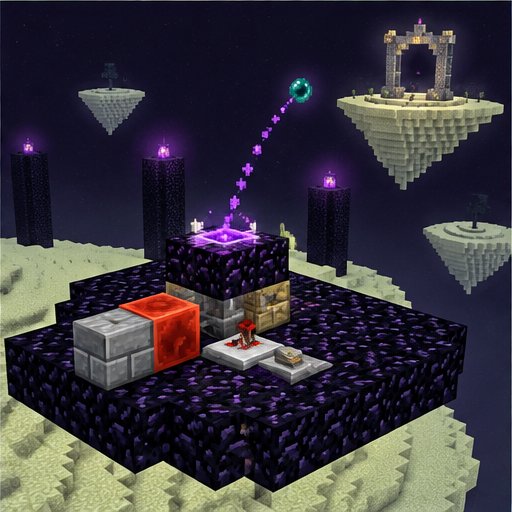
This guide uses a manual throw rather than a dispenser or timed mechanism. Do not assume a dispenser-fired pearl will teleport the player who activated it. Player-thrown pearls provide a straightforward survival method without depending on specialized redstone behavior.
Gateway Mechanics and Limits
End gateways are the small bedrock structures containing a single dark, starry portal block. They are different from the large exit portal that returns you from the End. Defeating the Ender Dragon opens a gateway near the central island; later dragon victories can add more, up to 20 around that island.
A central-island gateway leads toward the outer End islands and establishes an associated outer gateway when first used. Naturally generated gateways elsewhere in the outer End can instead return you toward the central island. Do not assume every gateway forms a convenient two-way route: record coordinates and verify both directions.
The bedrock housing prevents ordinary upright entry, but a pearl can pass through a side opening and hit the portal block. Gateway travel uses destination-position logic, so placing a pad somewhere nearby does not force arrivals onto it. Observe the actual arrival location before committing to a permanent build.
Materials and Preparation
Bring Ender Pearls, food, a pickaxe, several stacks of building blocks, slabs, signs, and blocks for guardrails. Carry at least one spare pearl for the return journey, plus extras for mistakes and route checks. Cobblestone is a useful structural material because Endermen cannot pick it up. Use contrasting blocks to mark the throwing position.
A complete 9-by-9 platform contains 81 blocks before allowing for existing terrain or the gateway structure. That is a useful planning footprint, not a required gateway dimension. Bridging distance and the destination terrain determine your actual material needs. Keep additional supplies in a chest back on solid ground.
Pearl teleportation normally deals 5 health points, or two and a half hearts, before applicable protection. Travel with full health; Feather Falling can help reduce pearl damage. A water bucket is useful in the End, but it cannot rescue you reliably after a bad throw into the void.
Step-by-Step Construction
Step 1: Record the central gateway’s coordinates and your route back to the main island. Approach over solid terrain where possible. If bridging is necessary, build while sneaking and add side barriers before treating the bridge as a regular travel route. Never test a pearl trajectory by throwing across open void.
Step 2: Build a working platform beside the gateway, supported by your own blocks rather than attempts to alter its bedrock housing. Bring the standing surface to a height from which you can clearly see the central portal block through a side opening. Leave that opening unobstructed.
Step 3: Mark a throwing tile a few blocks from the opening. Add side barriers and a rear barrier, keeping them out of the pearl’s path. Aim into the exposed portal block, not at the bedrock above or below it. A pearl that hits nearby bedrock can teleport you onto the local structure instead of taking you through the gateway.
Step 4: Make the first trip with inexpensive equipment, full health, spare pearls, and building blocks. Ideally, inspect the route first in a creative copy using the same edition and version. After arrival, stop moving and check the ground, nearby edges, gateway position, and coordinates before opening menus or placing signs.
Step 5: Expand safe ground around the observed arrival area. Add barriers near drops, but leave the gateway opening and arrival space clear. Do not enclose the exit in a tight box: new blocks can affect where the game finds a suitable arrival position. Build a second marked throwing station for the return trip.
Step 6: Test both directions several times without changing the pads. Record where you actually appear. Label signs with destination coordinates and a clear route name, such as “Main Island North” or “Outer Islands Supply Base.” Only upgrade the approach and move valuable cargo after the route behaves consistently.
Troubleshooting and Maintenance
If a pearl hits the housing, adjust your standing height or aim; do not simply throw from farther away. Pearl trajectories curve downward. Remove signs, rails, or decorative blocks that intercept the throw. If travel does not trigger immediately after another use, allow the gateway’s brief cooldown to finish before trying again.
If arrivals shift after construction, clear the immediate exit area and retest. Lighting improves visibility but is not reliable Enderman spawn-proofing in the End. Use bottom slabs on suitable approach surfaces, keep the tested arrival area uncomplicated, and avoid looking directly at Endermen.
Edition and Server Alternatives
Gateway placement details, arrival behavior, and pearl handling can vary with Java or Bedrock versions, updates, and server modifications. Recheck the route after changes. If a server restricts pearl travel, a trapdoor-assisted crawling entrance can provide direct gateway access where your edition supports it. Test that arrangement safely first. Otherwise, use an established bridge or a carefully supplied elytra route rather than assuming a redstone launcher will bypass the limitation.
Please support us by visiting one of our partners: Amazon