
Compact Honey Block Elevator
Introduction
What This Elevator Can Actually Do
A honey block elevator can provide a compact, rail-free lift, but a vertical stack of upward-facing sticky pistons is not a working elevator by itself. Ordinary pistons do not extend through one another, and moving a honey wall beside a player does not automatically create a dependable ride between floors. Observers detect changes; they do not independently coordinate a safe piston sequence.
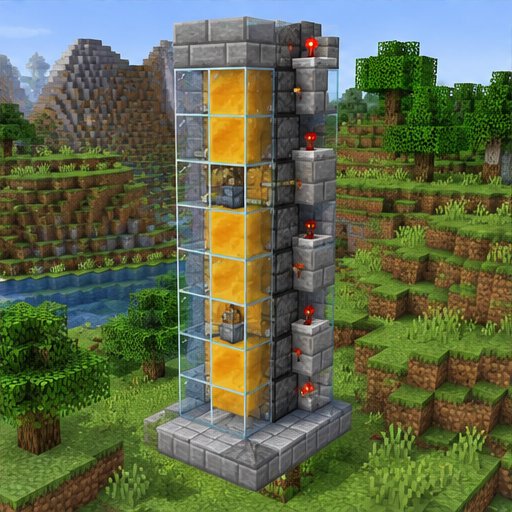
The practical starter design below is a one-block, manually controlled honey lift. You stand on the honey block while a sticky piston raises it. This is a small entrance feature or demonstration, not a tall elevator. It uses ordinary mechanics available in modern Java and Bedrock editions, without relying on short-pulse behavior. For substantial vertical travel, use the bubble-column alternative described below.
Materials and Space
For the lift mechanism, gather one sticky piston, one honey block, one lever, and one solid building block for mounting the lever. Also bring at least two glazed terracotta blocks for the boarding and exit edges, plus whatever blocks your surrounding floors require. Glass is optional for a protective enclosure. No observers or redstone clock are necessary.
Glazed terracotta matters because honey does not stick to it. Glass, despite its appearance, is not a nonstick lining: honey can attach to adjacent glass and attempt to move it. Keep decorative glass separated from the honey block’s travel path by an air gap.
One honey block requires four honey bottles. Honey also does not stick to slime blocks, but adding slime introduces other movement interactions and is unnecessary here. Leave at least three clear block spaces above the extended honey block so the rider has comfortable headroom.
Build the One-Block Lift
Step 1: Mark the vertical travel cell. For clarity, call the sticky piston’s block position height 0. Place it facing upward, then place the honey block directly on its face at height 1. When extended, the piston head occupies height 1 and the honey block moves to height 2. These numbers are relative construction levels, not required world coordinates.
Step 2: Build the lower boarding floor beside the honey block, with its floor blocks occupying height 1. The walking surface will sit slightly above the honey’s surface because honey has a reduced collision height. Use glazed terracotta for every floor block directly touching the honey’s sides. You should be able to walk from this floor onto the lowered honey without jumping.
Step 3: Put the upper exit on the opposite side of the travel cell. Its floor blocks occupy height 2, one block higher than the lower floor. The edge directly beside the extended honey must also be glazed terracotta. Keep the space above both landings open; do not place an overhang across the rider’s head.
Step 4: Check both positions of the moving honey. At heights 1 and 2, its four side faces should meet only air or nonstick glazed terracotta. Leave the space above it empty. In particular, remove ordinary support blocks hidden beside the travel cell: honey can drag attached blocks, and an immovable attachment or excessive load can prevent extension.
Step 5: Place a solid control block horizontally adjacent to the piston at height 0. Attach a lever to an accessible face of that block. Turning the lever on strongly powers the block and activates the neighboring piston. Leave a small access opening beside the lower landing so you can operate the lever while standing on the honey. Keep this wiring separate from the moving block.
Step 6: Test the mechanism empty. Switch on: the honey should rise exactly one block. Switch off: the sticky piston should pull it back down. If it does not, stop and inspect the attachments rather than adding more power or an observer clock.
Step 7: Board the lowered honey, stand near its center, and turn the lever on. After movement stops, walk onto the upper landing. The small difference between the honey surface and the landing is within normal stepping height. Leave the lever on until everyone has exited. Reset it from the access opening afterward.
Troubleshooting and Safe Operation
If the piston refuses to extend, first test it with only the honey attached. Pistons normally have a 12-block movement limit, and honey can unintentionally collect surrounding blocks. Restore the landing edges and enclosure gradually. If the piston remains powered after switching off, check for nearby torches, powered blocks, or other redstone circuits.
If the rider catches on an edge or ceiling, widen the landing opening and increase overhead clearance. Do not substitute side contact for standing on the platform: honey-side sliding and entity movement are not a reliable handoff system. Honey also affects entities such as dropped items; replacing slime with honey does not make an item-proof mechanism.
A lever is deliberate here: it keeps the platform raised. A button resets automatically and may lower it before someone exits. Multiple-floor call controls need a separate control circuit, not simply more buttons. Validate any redesign empty and close to the ground, especially on servers with movement or redstone modifications.
For Taller Buildings
Use a soul-sand bubble elevator for a dependable tall route in current Java or Bedrock. Enclose a water column, make every water block a source, and place soul sand beneath it. Growing kelp through a filled column before removing it is a practical way to establish source water. Provide a separate, safely enclosed return route.
A taller moving honey platform generally requires an edition-specific flying-machine design, stopping stations, and considerably more clearance. Java and Bedrock piston and observer behavior differs, so do not assume one engine works in both. Keep this compact lift as the simple one-block version unless you have a design explicitly suited to your edition and server.
Please support us by visiting one of our partners: Amazon